November 25, 2018 - Day 389 - iPhone 7 Plus Daily B/W Photo Challenge - Pokémon Damion - Click photo for larger view.

My Long Term iPhone B&W project comes to a close

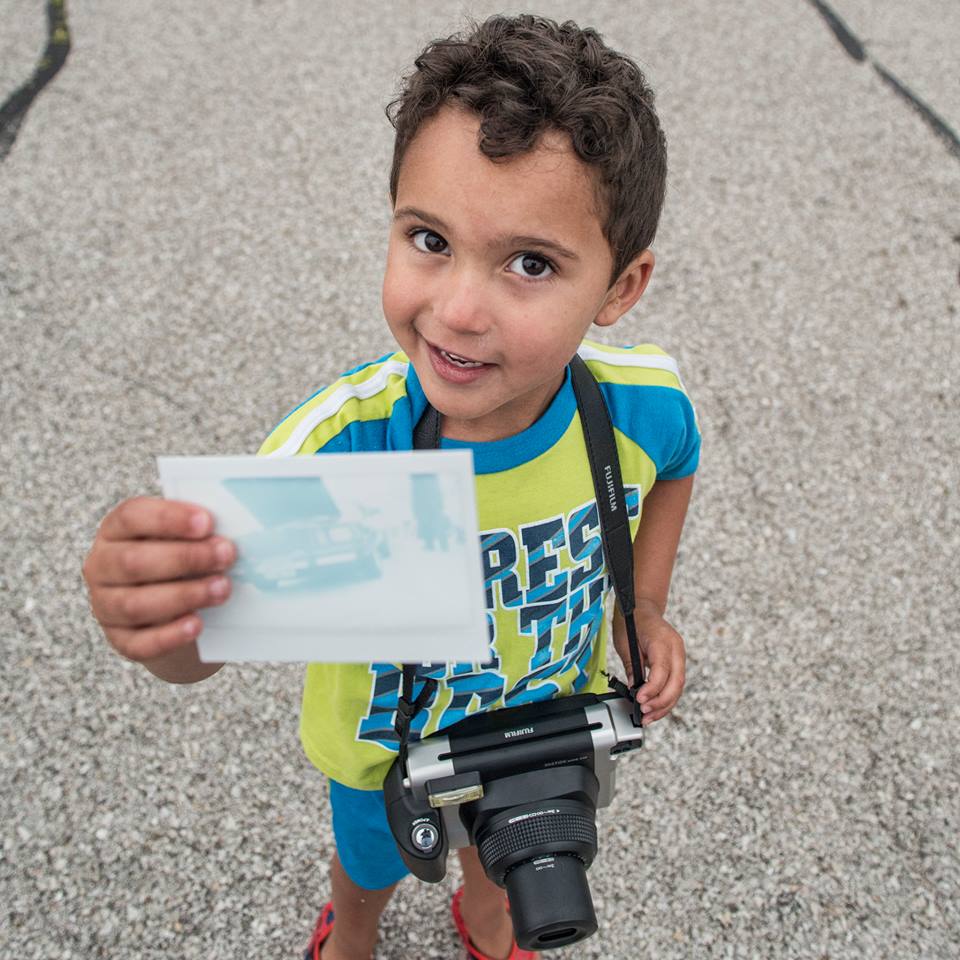
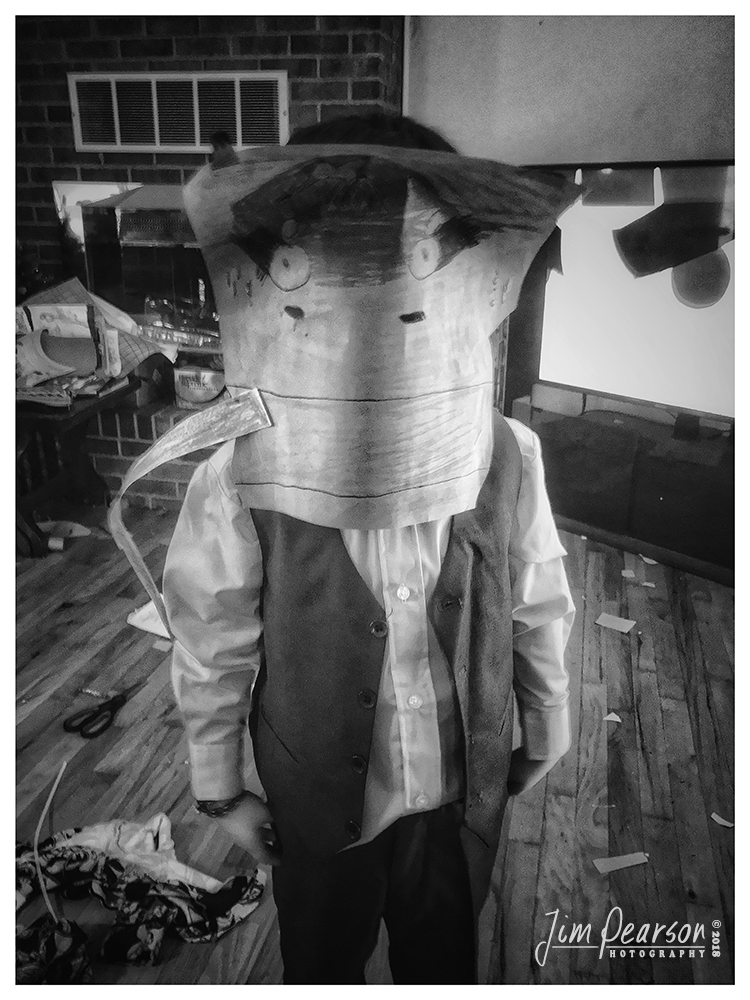
Above: My nephew Damion is one of our budding artists in the family and at left he sports a Pokémon mask that he made, before we head off for church.

Well, it seems that day 389 is where I stopped my current long term project of shooting a back and white photographs using my iPhone 7 Plus, after missing a couple days due to the winter crud going around here in Western Kentucky. When I started the project on October 31, 2017 I wanted to see just how far it would take me and I’m there! At first my goal was to do it for a year, then that turned into 400 days, and though I am shy of that goal, I’m still extremely happy with the project and the photos I’ve got over the last 389 days. Who knows, it might well just turn into a book project next, but that’s for another post down the road.

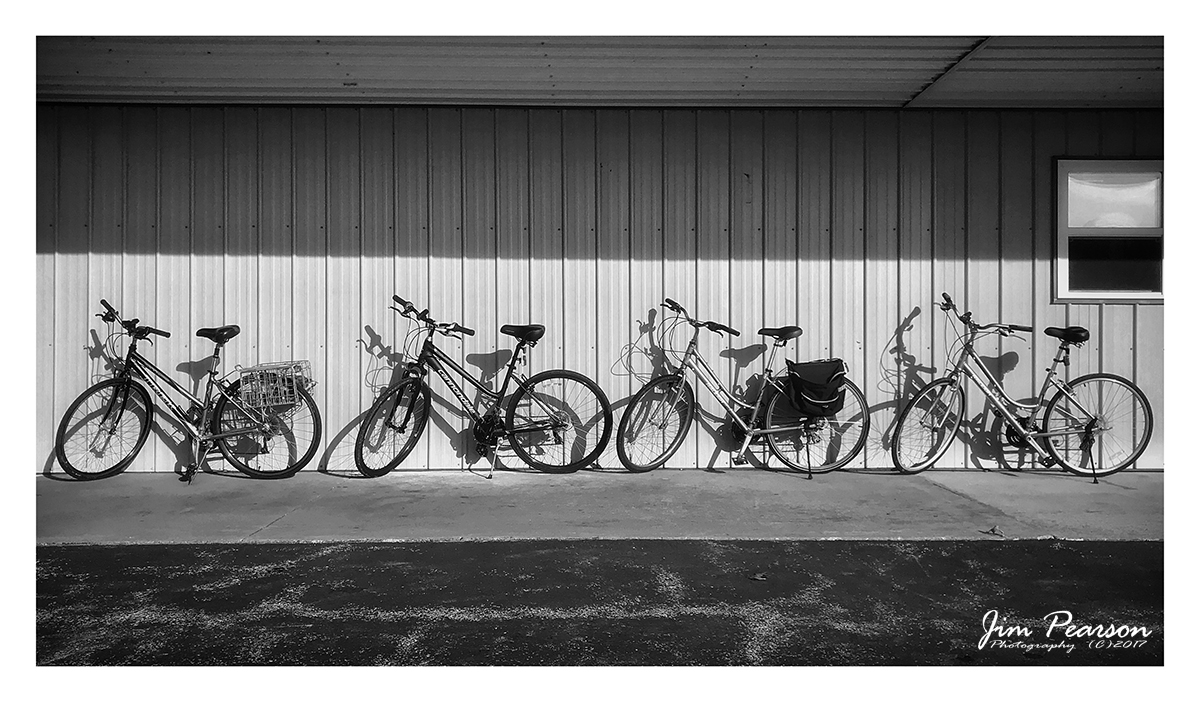
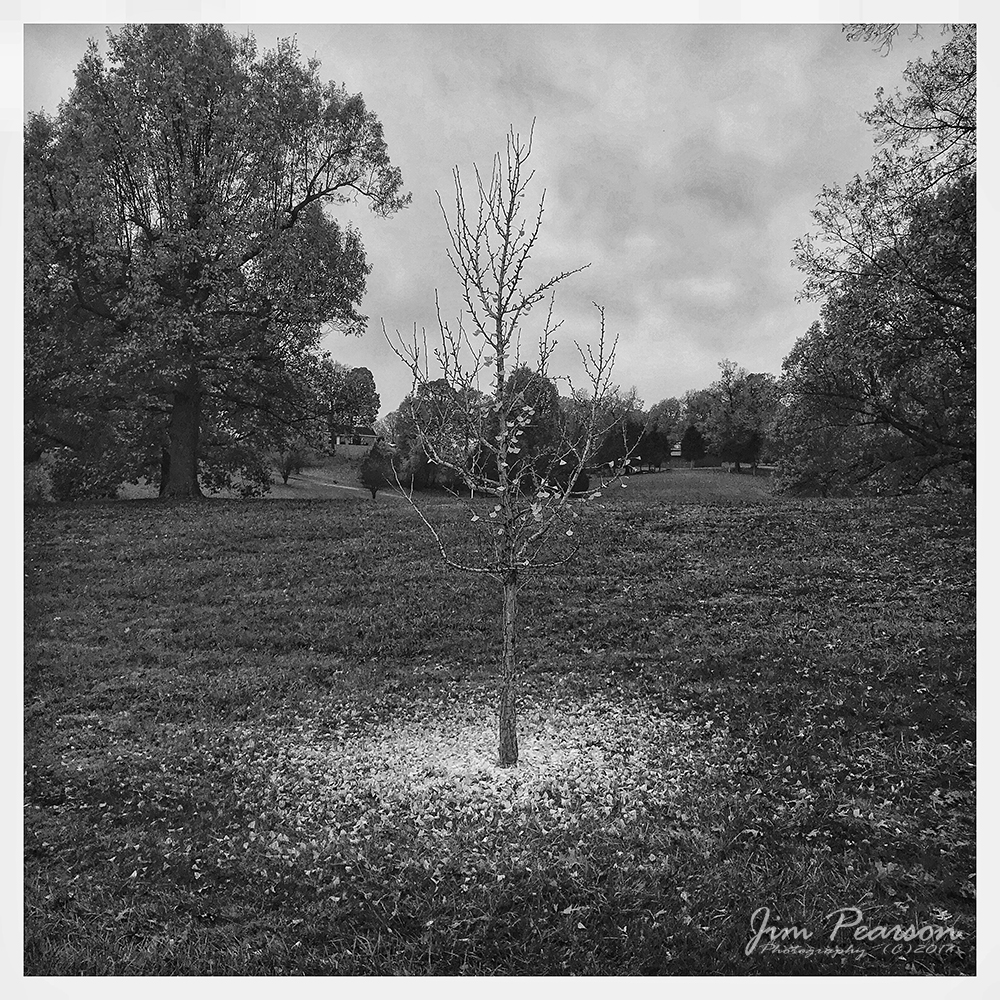
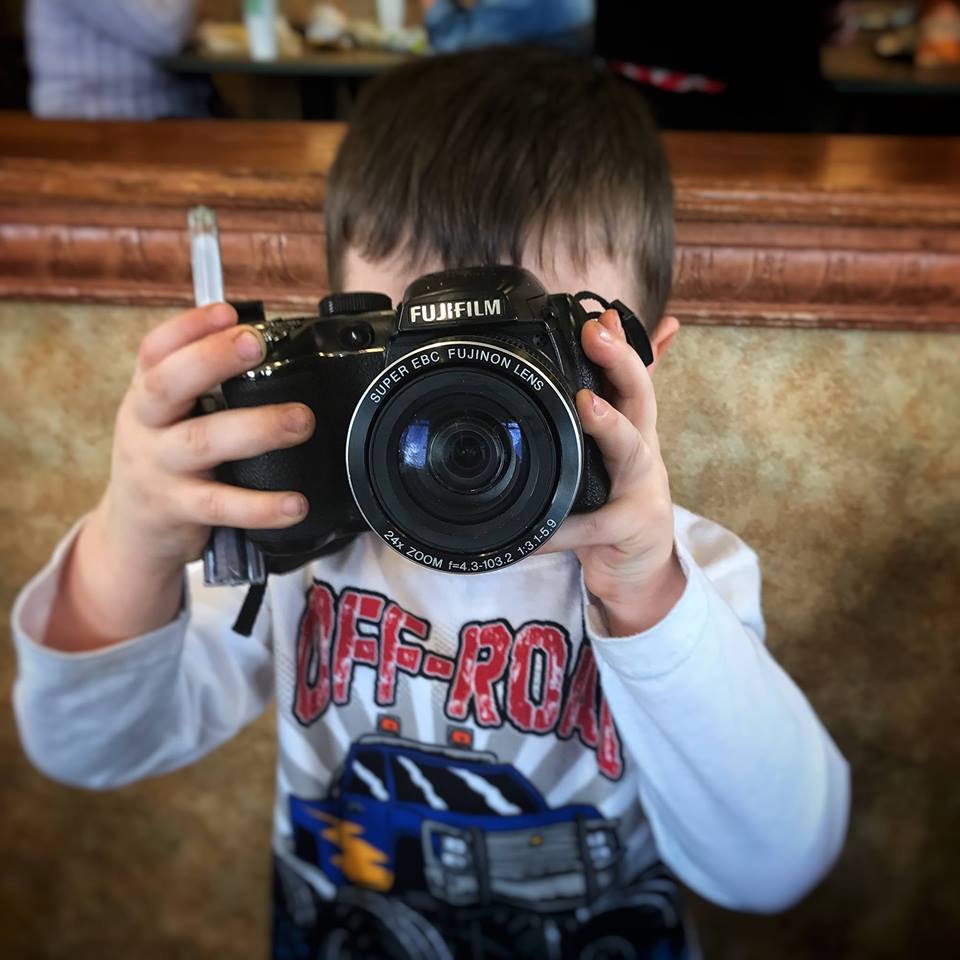
With that being said here’s my parting shot for this series, which was taken two days after my last portrait.

I hope you all have enjoyed the photos of my nieces, nephews, family, friends and interesting things that have come across my iPhone 7 Plus during the project.

So, now that this one’s over I thought I’d reflect back on what I’ve learned from this personal photography project and share my thoughts on how taking on a personal one of this nature can go about improving anyone’s photography.

First, this isn’t my first long term project that I’ve done over my photography career. I’ve done several year-long ones in the past and the most recent before this one was for a gallery display that was called 100 Veterans of Hopkins County, where I made portraits of 100 Veterans that live in Hopkins County, Kentucky.

Every time I decide to do a project like this it’s because I want to challenge my self to improve in some aspect of my photographic life. With the Veterans project I wanted to improve my portrait photography skills and also give back to the Veterans in my community and with this most recent iPhone project I wanted to challenge myself to shoot more photography with my iPhone to better learn just what it is capable of and I’m sure you’ll agree, if you’ve been following my progress, it’s a lot!

All photographers are able to capture one or several outstanding photographs in a year or lifetime and that in itself isn’t all that impressive because everyone will achieve this at some point or another. However, being able to take good or great photographs regularly is something else entirely! Anyone can eventually take a good photo, but in order to stand out in the crowd of today’s digital onslaught of photographers you need to be able to create a collection of good photographs and a long-term project can help you achieve that.

One way to learn how to create great photographs on a regular basis is by working on a project and that is why they are important for both artists and photographers alike! They don’t just help you to improve technically, but also artistically and help to improve your visual focus. Of course the success of a project is always rests with the audience for your photography, so a long-term photography project challenges you to improve the way you express yourself through your photography and forces you to communicate your thoughts and ideas better through your pictures.

A project also can help you to focus on one aspect of your photographic journey that you feel you may not be the strongest in! It can also keep you from shooting randomly and reaching toward a goal in your photography.

When doing a long-term photography project there will be those days when you just can’t get motivated and nothing seems worthy of your camera lens! Don’t worry, it happens to everyone, but some of the following tips may help you get through those slumps like they did with me.

First and foremost, announce to the world your intention to do a year long, month long or whatever length of photography project on related social media platforms such as Facebook Groups, Instagram, Twitter, ect! By doing this it will help hold yourself accountable to complete it and your family, friends and followers will help cheer you on and see your daily contribution to your project. Upload your pictures daily as well! If you wait and do them weekly you’ll find it less engaging and difficult to keep up with.

Make a list of photo ideas for the length of your project. Doing a year long one? Then come up with one or two words for a theme for each day of the year to photograph. Perhaps, do the same thing for a month at a time such as, December could be Christmas and for the whole month you shoot photos related to that holiday. The options are limitless so brainstorm and make a list that contains ideas that you can refer back to on those days that you’re not inspired!

Well, there’s so much more that could be covered in a post like this. Google “how to start a photography project,” and you’ll find a wealth of information and inspiration!

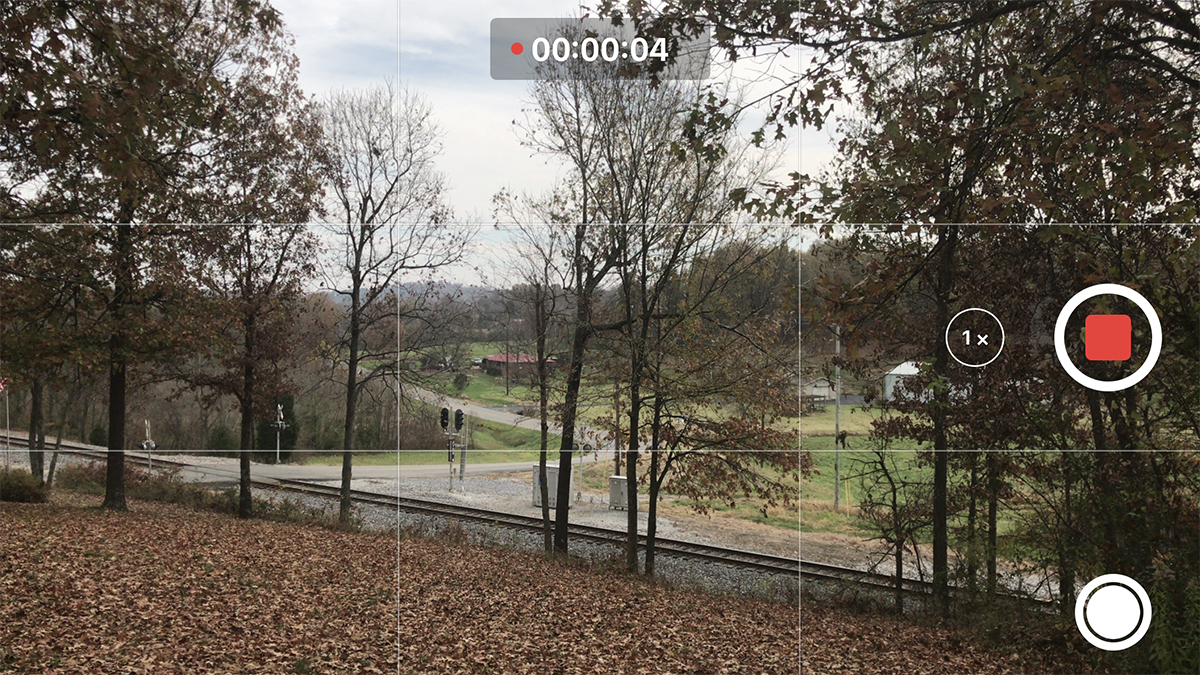
No it’s on to my next project, Long Exposure Photography! – Keep shooting everyone!


Technical information on how I shot this photo of Norfolk Southern’s 8099 Southern Heritage Unit at Princeton, Indiana

June 9, 2018 – Here we find a crew getting NS Heritage 8099, Southern Unit, ready for pickup by an, Duke Energy coal train, at the NS Yard Office in Princeton, Indiana, after storms passed through the area.

Today I’m going to break down the technical information on how I shot this photo of Norfolk Southern’s 8099 Southern Heritage Unit at Princeton, Indiana.

Here’s the technical info on the picture: Nikon 800, full frame camera with a Nikon 18mm f/2.8 lens. Exposure was ISO 200, f/2.8 at 6 seconds as a RAW file with Auto White balance and by default I underexpose my photos by a -.7 exposure. I find this helps me recover the highlights in the picture.

Now, my thoughts… Of course, the photo was shot on a tripod, thanks to Ryan Scott as I forgot to put mine back into my new RAV 4 before the trip. If you’re out shooting after dark, you really need to use a tripod for best results. You can brace your camera on a wall, or something stationary and get acceptable results, but for the best results, use a tripod.

When shooting at night I always set the mirror to lock-up before shooting the photo to help cut down with camera shake and set the self-timer to 3 seconds, so my hands are off the camera when the exposure is made. You can use a remote type device as well, but I find the self-timer works well for me.

Next, take your camera off Auto ISO! If you’re working on a tripod at night, you don’t need the high ISO and by setting it to manual, say around 200-400 ISO you’ll get a lot less noise (grain) in your photograph.

Exposure: I usually set my f/stop to the widest opening, ie: f/2.8 in this photo. If you’re planning on stopping down, I’d keep it at about f/5.6-8. That’s my preference anyway. Shutter speed is always going to depend on the light, but I’d start out at about 10 seconds, shoot a shot and then check your preview. If your photo is too dark, increase your exposure, not your ISO, unless you absolutely have to. If it’s too light and washed out, then shorten your exposure.

White Balance… I shoot everything with auto white balance turned on. This helps me in the RAW plugin to correct the off-color lighting of the yard lights, street lights, etc. best. At least it does for me. The lights to the left of this photo put out a bright orange light, so much so that I find it unsuitable for my taste.

We all have our own idea of how we want our final photograph to look and I’m no exception. I’m to the point these days that when I’m shooting a picture, day or night, I have a preconceived idea of how I want the final picture to look when I’m done processing.

Finding standing water to reflect your subject in will always add impact to your image, but sometimes that’s not an option, so look for other things that can help add impact. However, as an early mentor in my life told me about things in your photo, if it doesn’t contribute to what you want your picture to say, then eliminate it by changing your focal length or camera position. Try your best to shoot the photo in the camera the way you want your final image to look so you don’t have to do any cropping.

Any other questions just post them in the comments!

December 1, 2017 – Day 32 – iPhone Daily B&W Photo Challenge: Pound Puppy


December 1, 2017 – Day 32 – iPhone Daily B&W Photo Challenge: Pound Puppy – I took my niece Elaina to her mom’s work to wait for her to get off this afternoon and while we were sitting in the RAV4 she kept say, what is that from the backseat. I couldn’t quite tell if she was talking about a game on her tablet or what until she pointed at the window in front of where we were parked and there appeared to be a little “Pound Puppy” sitting looking at the car! Well, I never let a photo opportunity pass by, so we got out, so I could take a picture of it when Elaina stepped in to the scene and looked up at the puppy. Click!!! Black and White picture of the day!! Thanks Elaina! Always be aware of your surroundings that may lend themselves to a picture, and sometimes take a kid along so they can point out things right in front of you! LOL – #iphone7plus

November 16, 2017 – Day 17 – iPhone Daily B&W White Photo Challenge: Shadow Bikes!

November 16, 2017 – Day 17 – iPhone Daily B&W White Photo Challenge: Bikes! While I was out today chasing and photographing trains I passed by this Mennonite Store in Crofton, Ky and spotted all these bikes parked in a row and hoped they’d still be that way when I came back by from photographing the train I was chasing. I know, you should never pass up a picture, but I was torn between the two and chose the train! Fortunately the bikes were still there when I came back and as a result this is my picture for the day!

Camera Mode on the iPhone.

This photo really helps to illustrate a tip that I want to pass onto everyone as well! When shooting with the iPhone camera do you ever wish you could do so using the full screen of the phone, instead of the scaled back camera you normally get?

Video Camera Settings

Most folks don’t realize that, you can do this by using the video camera of the iPhone! To do so first you need to head to the camera settings on your iPhone under the Settings App on the iPhone. Open it up and scroll down till you find the Camera settings and open them up.

Then change the Record Video settings to the highest Quality your iPhone will support. For mine it’s 4k video at 30fps (Frames per second). This will insure that you’ll get the highest quality photograph from the phone.

Now you’re set to capture your first full screen photograph! Open the Video Camera and click on the record button. After your video starts recording notice the small silver shutter button that shows up under the video camera’s red button.

Shooting video, showing the still camera button below the video record button.

Each time you press this button the camera will create a photograph of the scene using the full screen of your camera!! This is a great feature for the times you have a long skinny photograph you’d like to shoot and not crop from the regular camera! You can also shoot tall verticals by turning the camera vertically!

You’ll end up with a bunch of little video clips on your camera roll, but after you’re done you can go back and delete them, keeping only the photographs you shot! That’s it! Hope you enjoy using this little tip and please feel free to share!!

November 15, 2017 – Day 16 – iPhone Daily B&W White Photo Challenge: Fall

November 15, 2017 – Day 16 – iPhone Daily B&W White Photo Challenge: Fall – I’ve been eyeing this tree since Sunday for the right time to capture it for this series. I knew that the yellow gingko leaves would produce a great contrast to the ground and sky under the right conditions and today was the day! When you find an interesting picture it’s always a good idea to capture it when you’re there as it may be gone the next time you pass by. However, there’s nothing to prevent you from revisiting the scene on a day where you think the light and conditions might produce a better photograph. Be flexible in your shooting! Also when shooting black and white keep an eye out for good contrasting colors as they can help make for great photos!

November 14, 2017 – Day 15 – iPhone Daily B&W White Photo Challenge: Patterns

November 14, 2017 – Day 15 – iPhone Daily B&W White Photo Challenge: Patterns – Every time in Louisville, Ky I try to swing by the train yards there and see if I can’t capture a few pictures. Today when I was there I found the light on these silos next to the Paducah and Louisville Railway line lit with these beautiful patterns from the light and captured today’s photo with my iPhone. I included the rails and cars as I thought that their lines helped to add to the vertical lines of the tanks! Incorporating patterns into your photos is a way to help add visual interest to your shots!

November 13, 2017 – Day 14 – iPhone Daily B&W White Photo Challenge: Bike!

November 13, 2017 – Day 14 – iPhone Daily B&W White Photo Challenge: Bike! – Shooting with the iPhone at night can be a real challenge as with any smartphone. One of the keys is the pick a subject that is well lit. Another is to use your smartphone as you would any other camera! Hold it steady, brace yourself and press the shutter slowly! You’ll come away with a better photo!

November 12, 2017 – Day 13 – iPhone Daily B&W White Photo Challenge: They Move Fast!

November 12, 2017 – Day 13 – iPhone Daily B&W White Photo Challenge: Two of my many favorite photography subjects these days are my great-great nephews, Jayden and Damion! Here I caught this shot of them sending thumbs up and love my way to the camera during lunch today and of course the kid smiling in the background at their antics helps make the photo stronger!! When shooting kids on the iPhone it’s best to use the “Burst Mode” and pick the best! They move fast! LOL 

Black and White iPhone Challenge

This project started out on October 31 as a 7 Day Black and White Photo Challenge on Facebook. After the week went by I enjoyed it so much that I’ve decide to continue with the project as long as it takes me. These are the first 10 photos I’ve shot here in a gallery. Others I’ll post daily.

I hope you enjoy viewing them as much as I did taking them!

Perhaps, sometime down the road some of these will be in a book!

There is no gallery selected or the gallery was deleted.

Waiting for the Boo moment!

My nephew Xavier waits for his Gigi to walk by so he can scare her! Capturing moments like this with your camera, iPhone or other smartphone are as simple as paying attention to the moments ar0und you as they develop and being prepared! I think I like the Black and White treatment the best, but I’ve included the color version for your input!

Shot with an iPhone 7plus and processed in Snapseed!

Young railfan at East Chattanooga, TN

September 9, 2017 – I was thinking that this scene would make for a nice shot if only I had a central subject, other than the platform and passenger cars, when I heard the patter of little feet running up behind me and this little boy ran past me, at the East Chattanooga, TN Depot sign at the Tennessee Valley Railroad Museum, into the scene and looked back! The fact that he was dressed as an engineer made it even better!

How many of us can recall what it was like to be a child this enthused by a steam train or any train for that matter! I hope the child in all of us never goes away when it comes to our passion for photographing, riding, watching, observing or anything else that has to do with trains!

When out shooting your rail photography don’t forget to record the people and not just the trains! One without the other won’t exist, especially when it comes to historic preservation!

Kids, Photography and a Roadtrip

Xavier, 5, using the Fuji Wide Instax instant camera.

Kids and Photography… (hang in there, the roadtrip part is toward the end of this post). With the advent of digital photography being in the hands of just about everyone via smart phones, tablets and digital cameras, the world of photography is in the hands of many kids starting at an early age. I personally have been photographing most of my nieces and nephews since the day they were born, even more so for their kids and their kids kids. As a result the youngest ones, my great-greats, started reaching for my camera or smart phone from a very early age.

About a year ago I started a project with my oldest little ones and photography. I decided that, once they turned four years old, I was going to get a camera that they could use and start taking them on photography adventures where I’d go with them in a one-on-one situation. It’s been a wonderful trip with the three oldest among my great-great nieces and nephews that live in my area.  Going out shooting with them and seeing the world from their viewpoint has been a blast.

Jayden with the Fuji Instax

I started the three of them out sharing a Fuji Wide Instax, a Polaroid type instant camera. I wanted to have them use something that would give them a tangible print that they could hold in their hand and watch develop, much like many of us older folk did when we were kids. I feel that has helped them enjoy shooting photos more. I also got each of them a photo album to keep their pictures in so they can share them with family and friends. All three of the boys, Xavier, Jayden, and Damion have moved on to shooting a digital camera lately.

Now, the instant camera is in reserve for our next young photographer, Elaina, who turns four in July. Damion, her brother, still wants to shoot with the instant camera sometimes, but at $1 per photo I’ve  decided to move him and the others more into the digital realm. This way they can zoom and take as many photos as they want. I just make sure and get 4×6 prints of the best of the photos they shoot by the next day and give them to them for their photo books. I really can’t stress too much how important I feel this is. For the young photographer to have an album to thumb through, to relive and to share his or her adventures in taking the photos is very important. If the image sits on the camera, which they need to have adult supervision when using, or on a laptop that they can’t use without an adult, it’s hard for them to go back and look at their pictures whenever they want to. I feel having easy access is a very important part of their growth in this visual world!

Damion shooting with a Fuji FinePix S4250

Now, they are 4-5 years old and, with this in mind, I didn’t want to start them out on a expensive digital point and shoot camera. I’ve worked with them on handling the camera carefully and to keep the camera strap around their neck when they use it and they all three do a good job, but still, they are kids!

I shopped around our local pawn shops and found a lightweight Fuji camera, with a viewfinder and LCD screen, they could use that wasn’t real expensive. I wanted the viewfinder as that’s what they were used to with the Instax camera. I paid $50 for a Fuji FinePix S4250 which is a 14mp camera with a 24x optical zoom. It only weighs a pound and is just the right fit for small hands! They’ve been using it for about six months now and it’s still working great, with limited drops! I just looked yesterday at a local pawn shop and they had one just like it for $30. I think if you shop around you can find something in the same price range.

I’ve been showing the kids copies of the pictures I shoot of them, pretty much their whole lives, so they’ve been exposed to what I consider photos with good composition for sometime. On the shooting and direction aspect of kids shooting photos at a young age, I’ve not tried to guide them a whole lot when it comes to composing their photos. Occasionally I might recommend they move in a little closer or perhaps stand in a different spot but, for the most part, I don’t look over their shoulder, point the camera for them and tell them when to press the shutter. I feel if I do that, it’s not really their picture they’re shooting. Do they always come back with what I think might have been the best photo? No, of course not, none of us do when we first start out in photography and many of us still don’t even after doing it for 40+ years, like myself!

As their photo editor (haven’t started the post production with them yet) I do occasionally crop their photos (digital) and make other minor corrections in editing, but for the most part the photos they shoot are theirs, the way they saw them.

Damion and uncle Jimmy at Pennyrile Forest State Resort Park. – Photo by April Pearson

And, now, the Roadtrip…. Recently my sister, April, and I took Damion with us to the Spring Photography Weekend at Pennyrile Forest State Resort Park in Dawson Springs, Ky, for his first photography competition in the children’s division. We all three had a blast! We’re planning to take Jayden to the Fall weekend there and then Xavier next Spring for their first “competition.” Getting the kids out shooting where other kids are involved I think is just another step in their adventure with photography.

Damion loved exploring and capturing photos along the way during the weekend. He told us that he hoped he’d win a trophy and he did!! First place in the landscape category and a third place in the water category! Not sure who was prouder, him or us! What he referred to as “Secret Caves,” were among his favorite spots, along with the waterfall, and his “Secret Steps” which is the photo that won him his first place trophy. I love the fresh viewpoint that the young kids have with their photography.

Where do I hope the kids go with this photography thing? Well, my hope mostly is that they have a love for photography and the world it opens for them.  So, when to start your young photographer out? I personally picked 4 years old, but you can start them whenever you feel they are old enough so that you can communicate with them, when they can understand and follow simple directions.  So that you can converse with them and they can understand you and you them!

Below are Damions two winning images from his first photo competition.

First Place Children’s Division – Landscape – Pennyrile Forest State Resort Park.

Third Place Children’s Division – Water – Pennyrile Forest State Resort Park.

If you’d like to follow the Shutterbug Kids, they have their own Website, Facebook and Instagram pages all maintained by me, their uncle Jimmy. Below are links to each of them. The boys aren’t directly involved with the social media aspect yet, although they do ask if I’m going to put their picture on Facebook sometimes, so they are aware.  That lesson will have to wait a few years, but they really enjoy seeing their pictures online.

Damion

Facebook, Instagram, Website

Jayden

Facebook, Instagram, Website

Xavier

Facebook, Instagram, Website

In closing, get out with your little ones, make memories and capture them together! You’ll be happy you did and they will as well!

When one picture decays then you find another!

Saturday I set out around noon to shoot a picture for the West Kentucky Photography Club’s weekly challenge, which had a theme of “Decay.”

Earlier in the week I had passed this house close to Lake Malone in Dawson Springs, Ky that was literately falling in from the roof down. There wasn’t a place on the road to pull off and at the time I was looking for a feature photo for the newspaper I work for and decided to log it into my brain for a return visit as I thought it would work out well as an HDR for the challenge.

Saturday I decided to head back down to the house and ask the people that lived next door to it if it’d be alright to take a picture of it. Now, I normally don’t feel the need to ask, but in this case I had to park in their driveway as there wasn’t anywhere to pull over on the road. With that being said, as you can tell this picture isn’t the house, but sometimes things work out the way they’re supposed to.

I caught the guy that lives next do getting out of his truck in the driveway. After introducing myself and talking about the weather briefly I asked him about taking a picture of the house and what it was for and he said it belonged to his brother and he couldn’t give me permission to shoot a picture of it and he’d rather I didn’t. So, that was the end of that picture and the beginning of the one you see on the page here.

I was disappointed and decided to head on down the road to Princeton, Ky looking for something else to fill the challenge and when it was all said and done I ended up in Paducah, Ky. I’m not sure just how the idea of this picture of a graveyard popped into my head, but again things just work that way sometimes. Now, I agree that you can’t see the decay that is going on, or has gone on, in this picture, but there’s not a single person that can’t imagine it, so it worked and I ended up liking this picture much better than I think the other would have turned out. Plus, I got 8-10 other really nice images I liked out of the trip, many of which are now available for purchase in my online sales store.

The picture is a High Dynamic Range (HDR) photo taken with my Nikon D700 with a series of three separate exposures, one normal, one over by a stop and one under by a stop. The lens of choice was my Nikkor 18mm f/2.8 and I hand held the camera for the three exposures.

The three images were combined using Photomatix Pro and then brought into Photoshop CS5 for final processing using Topaz Adjust for this end result.

If you’d like to learn more about HDR Photography I’d suggest you visit Stuck In Customs.

So, when you set out to shoot a picture for your project always keep your eye and mind open to other possibilities, because you never know you might get a better picture.

Till next time – keep clickin!

“The Photographer” by Jim Pearson

I shot this picture last year during the annual Scott Kelby PhotoWalk when I was in Los Angles and as all good photographers, just getting around to processing it the way I envisioned the photo.

I am one of the all time great procrastinators, just as my sister or anyone else in my family and they’ll confirm it with out a doubt. Working for a newspaper for last fifteen or so years I’ve become accustomed to working on a deadline, unless it’s for myself, then I’m more like the TV repairman that never fixes his own set.

I did two year long picture projects where I shot a picture everyday for both years, and I had planned to do the same this year with portraits, but it didn’t work out as I’d hoped and it turned into a portrait a week project. For the most part I’ve shot one a week, but getting them edited and posted here to the blog has been a bit more of a challenge for some reason.

I’m going to do better and while there will be perhaps some rambling on sometimes, I’ll try to relate what I was thinking or what I like about the photos that I post here for your viewing pleasure. Hopefully you’ll go away from my post learning a little bit or at least with perhaps some inspiration for your own shooting.

Now, back to the picture…

I stumbled on this church off of Olvera Street that had a shrine attached to and everyone was having a great time taking pictures of family members that I assume were destined for their first communion. I watched the scene for awhile till this photographer showed up with a family and he had all this gear on him and shooting what appeared to be Polaroid Cameras. I just couldn’t pass up the photo and thought about turning it in for my PhotoWalk image, but opted for a picture I shot in China Town instead, which won the walk I participated in. Now as an afterthought, I think I like this picture better than the one I turned in, which I’ve included below.

Stay tuned and sign-up to follow my postings by subscribing by clicking on the Follow tab in the right corner of this site and entering your email address.

Shots fired!

Hopkins County Sheriff deputy LyDon Logan radios in an all clear from a 911 call of shots fired from a resident on Willow Drive in Nortonville. Deputies and Kentucky State Police troopers laugh at the scene after investigation found the shot sounds were from eggs cooking on a stove top, according Deputy Logan. (Jim Pearson/The Messenger)

I went out to Nortonville, Ky with a reporter today about a shots fired call from a resident who armed themselves with a shotgun after they heard three shots. Kentucky State Police and Hopkins County Sheriff’s Deputies responded to the scene and it was pretty serious stuff, until further investigation revealed that the shots came from eggs that were left too long on the stove.

Sometimes it’s just a matter of waiting

Parents wait for their children, in blowing wind and snow, Thursday afternoon at West Broadway Elementary School in Madisonville. Hopkins County Schools were dismissed two hours early due to the threat of freezing temperatures and snow. (Messenger Photo by Jim Pearson)

I heard early in the day that they were going to dismiss school two hours early today due to the weather and decided I wanted to get a picture for the front page of the paper as parents were picking up their kids.

West Broadway Elementary is right down the street from the newspaper and so I made my way over there and positioned myself across the street as the kids were getting out. It was COLD!

I had a couple shots on the camera that were OK, but not really what I wanted so I waited a bit longer till I saw these two girls come out with a umbrella they were using to keep off the snow, or so they thought and I knew I had what I wanted and then one of the parents threw up his hand to wave at his child at the door which helped make the photo for me 100% better. I decided that I wanted to include the activity on the left side of the photo to show the kids rushing in the cold and other parents waiting to pickup their kids.

When you are out shooting a situation it’s always good to not rush yourself and be patient because you just never know when your picture will come together, even in the COLD.

Technical Details
Nikon D700
Nikon 80-200mm f.2.8 – 1/400th sec at f/10 @100mm
ISO 1600
Matrix Metering