Sometimes it’s just a matter of waiting

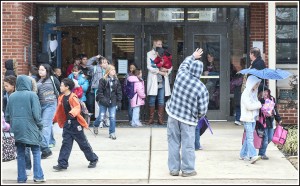
Parents wait for their children, in blowing wind and snow, Thursday afternoon at West Broadway Elementary School in Madisonville. Hopkins County Schools were dismissed two hours early due to the threat of freezing temperatures and snow. (Messenger Photo by Jim Pearson)

I heard early in the day that they were going to dismiss school two hours early today due to the weather and decided I wanted to get a picture for the front page of the paper as parents were picking up their kids.

West Broadway Elementary is right down the street from the newspaper and so I made my way over there and positioned myself across the street as the kids were getting out. It was COLD!

I had a couple shots on the camera that were OK, but not really what I wanted so I waited a bit longer till I saw these two girls come out with a umbrella they were using to keep off the snow, or so they thought and I knew I had what I wanted and then one of the parents threw up his hand to wave at his child at the door which helped make the photo for me 100% better. I decided that I wanted to include the activity on the left side of the photo to show the kids rushing in the cold and other parents waiting to pickup their kids.

When you are out shooting a situation it’s always good to not rush yourself and be patient because you just never know when your picture will come together, even in the COLD.

Technical Details
Nikon D700
Nikon 80-200mm f.2.8 – 1/400th sec at f/10 @100mm
ISO 1600
Matrix Metering

January 11, 2012 – A year of portraits – Hayden Terry

01.11.12 Hayden Terry

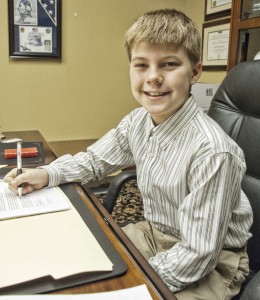
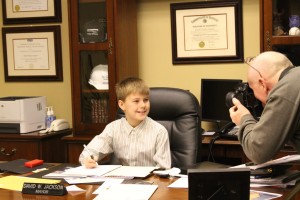
Tonight while waiting to cover Congressman Ed Whitfield speaking at Madisonville City Hall I spotted Hayden Terry trying on Mayor David Jackson’s chair for size and captured this image as my portrait of the day. Hayden’s grandfather, Phil Terry was once Mayor of Madisonville and when I asked Hayden if he had the same plans for his future, he informed me that wanted to be a veterinarian. His dad, P. T. Terry said he just wants him to go to college and be happy.

Camera was my Nikon D700, 1/160th at F.6.3 with my 18mm lens. I probably would have picked a different lens, but it was on the camera for the congressman’s picture and I wanted to make sure I didn’t miss the photo. The ISO was 4,000.

Post processing today was done in Photoshop CS5 and I also applied the Clarity filter in Topaz Adjust for the final look of this portrait.

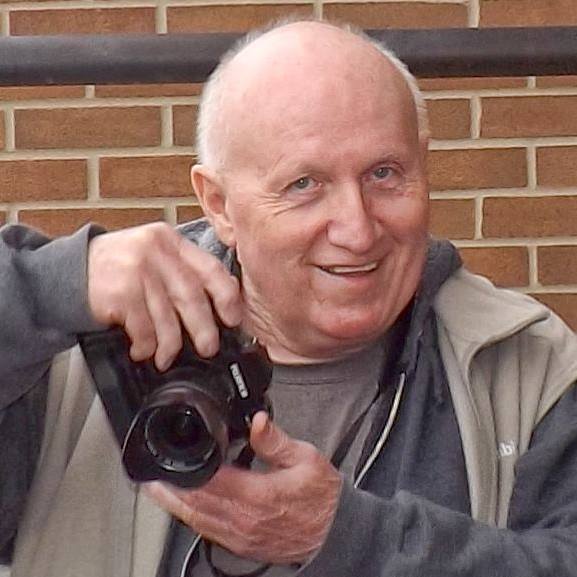
Photo by Gina Munger

Good friend Gina Munger captured me at work photographing Hayden Terry and shared her picture with me. Photographers can’t complain much when they get their picture made since we’re always photographing everyone else. Thanks Gina…

Nightcap a good camera app for low light

A complaint I have with my iPhone 4 is how badly it shoots photos in low light, without a flash. Well, “Interrealtime” has come out with a camera app for both the iPhone and iPad that has improved the quality of shooting in low light by leaps and bounds over most others I’ve found.

It’s called NightCap and is available in the iTunes Store for $0.99.

As we all know most cameras, SLR or Smartphones, all struggle to capture photos in low light. As the sun sets and the light drops off pictures tend to become dark and grainy in most instances when shooting by available light, especially with the iPhone’s native camera.

Interealtime’s solution was to develop an app that gives the camera time to capture more light – longer exposures in photography terms. Nightcap brings true long exposures to the iPhone, up to 20x longer than the built-in camera app. I’m truly impressed with the difference.
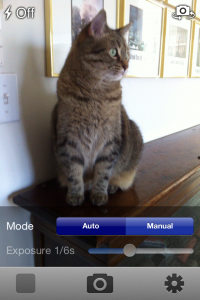
The screen for the camera is pretty standard and you can turn the flash on or off, switch from front to rear facing camera. Click on the settings wheel in the right lower corner to change from Auto to Manual mode. You can also preview your most recent picture by clicking on the icon in the lower left of the screen.

Nightcap takes full resolution pictures in either fully automatic or manual modes. In automatic mode it’s as simple to use as the built in camera and in manual mode it’s a lot more powerful. The results in low light area like night and day as you can see by these two examples I shot at a recent meeting of the Western Kentucky Photography Club.

The iPhone camera is limited to a fairly short exposure time which is roughly around 1/20th of a second. Nightcap extends that up to a full 1sec exposure, and this difference can produce a good photo when the built-in camera barely sees anything, unless you use a flash.

Also, even where it’s bright enough in low light for the built-in camera the image can still be very grainy (noise) due to the exposure being very short and the camera increasing it’s ISO to a high level. The problem here is higher ISO levels can also increase the noise (grain) as well. Since Nightcap can use a longer exposure it doesn’t need to boost the ISO as high which results in a clearer photo with less grain.

This being said, with any camera in low light it needs time to focus, and focusing can be slow in very low light. They are working on improvements to this and updates will be available to those who purchase the app through iTunes.

Of Course longer exposure times mean the camera is more susceptible to shaking. It’s important to hold the camera still when shooting in low light! For best results stabilize yourself against a solid surface, take several shots and pick the best one, or use a tripod or stand. There’s many adapters available to attach your iPhone to a tripod.

Also, fast moving objects will blur with longer exposures! However with experience you can take advantage of this to produce amazing photos this way. Try following a moving object with the camera while shooting, get it right and you’ll have a clear subject against a motion blurred background creating a real sense of movement.
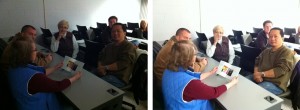
Click to view larger version

Far left, photo with built-in camera on the iPhone 4 with flash off, at right, same scene with Nightcap App in automatic mode. Nothing was done to the photos after they were shot for this post. I can only image how much better the Nightcap photo would be on the new iPhone 4s with it’s improved optics.

The screen for the camera is pretty standard and you can turn the flash on or off, switch from front to rear facing camera. Click on the settings wheel in the right lower corner to change from Auto to Manual mode. You can also preview your most recent picture by clicking on the icon in the lower left of the screen.

Device Requirements:
* Compatible with iPhone 3GS, 4 and 4S, and iPod touch 4G (iPod touch with camera)
* Requires iOS 5.0 or later
January 10, 2012 – A year of portraits – Erica and Will

01.10.12 Erica and Will

Sometimes photos just show up at my desk. Erica and her brother Will were making the rounds of the Newsroom taking orders for Girl Scout Cookies and took time to pose for this three minute portrait. I call it that because it took me about a minute to shoot 4 pictures with my iPhone, and the other two to pick the best one, open it in SnapSeed, edit it and apply the border to it, all while the kids watched the process. They liked the results, as did their mom.

Camera was the built in iPhone 4 camera with the editing done in Snapseed with adjustments to the shadows and highlights, the drama filter and then a frame applied to produce this final photo, all in three minutes.

January 9, 2012 – A year of portraits – Greg Collins

01.09.12 Greg Collins

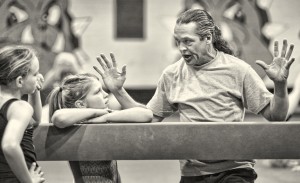
Today I decided I wanted to capture an environmental portrait of Greg Collins, the Director and Head Coach of Big Dogs Gym and Fitness in Providence, Ky. I was there today to capture a picture of his Gymnastics Team, that has been doing very well in competition, for Tuesday’s The Messenger Sports front, the newspaper I work for.

Wikipedia describes a environmental portrait is a portrait executed in the subject’s usual  environment, such as in their home or workplace, and typically illuminates the subject’s life and surroundings. The term is most frequently used of a genre of photography.

Where it is common in studio portraiture and even in location candid photography to shoot using a shallow depth of field, thereby throwing the background out of focus, the background in environmental portraiture is an integral part of the image. Indeed, small apertures and great depth of field are commonly used in this type of photography.

I used my Nikon D700 for this shot and the exposure information is: 1/320 sec at f/2.8 with an ISO of 4,000. The lens was an 80-200 mm f/2.8 Nikor at 112mm and of course it was by available light.

Post processing work was done in Photoshop CS5 where I did some dodging and burning along with cropping before applying a Topaz B&W Adjust warm tone filter with a little tweaking on the adjustments. I like the look and feel of this photo better in the warm B&W tones.


January 8, 2012 – A year of portraits – Rita McWilliams

01.08.12 Rita McWilliams

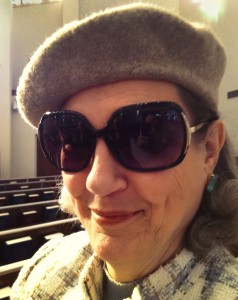
When I arrived at church today I spotted a friend Rita McWilliams sitting in the pews basking in the sunlight from the stained glass windows,  like a movie starlet hiding behind her sunglasses, and wearing this beret. It brought back fond memories from my time spent in Paris France and a scene that I saw there more than once during my visits. Rita is an avid, or perhaps I should say, master gardener, and was gracious enough to allow me to capture her likeness with my iPhone.

I shot this photo with the built in iPhone camera and already had in mind that I wanted to give a “Retro” look to the final photo, as if it could be a photograph from my past in France.

Processing was done on my Windows 7 computer using Photoshop CS5. Some dodging and burning along with a little bit of levels thrown in was about all I did to this image before applying the Topaz Adjust filter called “Retro Style I” with just a touch of tweaking from the default settings. I like the old, yellowed, vintage look and feel of the photo.

January 7, 2012 – A year of portraits – Chris and Xavier

01.07.12 Christopher and Xaiver

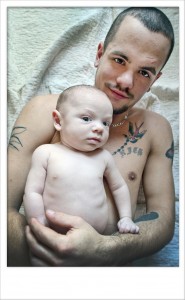
Today’s portrait is of Chris Brantley and his son Xaiver. They are my great, and great-great nephews that live here in Madisonville, Ky. Chris is a hard working young man that loves his son and I’m very proud of him.

This photo illustrates that you don’t necessary need a fancy studio or lights to get good portraits on location. This was shot on the floor of one of the rooms at his house where there was a window available to provide some soft light. I then took a quilt and laid it on the floor with the non-design side out so I had a simple background, rather than the hardwood floor. I then stood over them and shot a series of photos for about 5 minutes from which I like this one the best.

Camera was again the Nikon D700 with my Sigma 24-70mm lens. Exposure was 1/30sec at f/5.6 with a focal length of 26mm and an ISO of 2000. I love the D700 because it gives me the ability to shoot in low light with high ISO settings with out a lot of noise.

Post processing was done in Photoshop CS5 with some dodging, burning and some sharping by using the Topaz Adjust filters.

Now, for the border effect I emailed the web version of this photo to myself where I could receive it on my iPhone. I then saved the picture to my camera roll and opened it up in a app called Photogene, (available on iTunes) where I applied the border that you see here. Then I emailed the resulting image back to myself for this post. I could also have just downloaded it to my computer by tethering it with the USB cord, but for just one photo it was easier to email it. This is the first time I’ve tried doing something along these lines and I’m happy on how well it worked.


January 6, 2012 – A year of portraits – Bill McReynolds

01.06.12 Bill McReynolds and Daisy

Today’s portrait is of Bill McReynolds and his dog Daisy.

I’ve known Bill for several years now and stopped by his home this afternoon to get his help in identifying a flower that I was running in today’s paper. The weather has been so unseasonably nice for this time of the year that some are starting to bloom already. Bill served in the United States Air Force during the mid-50’s in the medical field and after leaving the service worked in the forestry field for a good part of his life and is always in the know about plants and so forth, so he was my go to guy today. I also wanted to look at some of the flowers that were in bloom around his house to see if there was anything better than what I got of a Phlox in bloom.

As I was leaving Bill and I were talking about this and that and I noticed his flag in the background and captured this shot of him and Daisy as we talked.

Photo was shot with my Nikon D700, on Matrix Metering at 1/250 sec at f/4 with an ISO of 640 using my Sigma 24-70mm lens (at 36mm). Post processing was done in Photoshop CS5 with some slight levels adjusted and the Topaz Adjust filter Clarity was applied to sharpen up the photo.

January 5, 2012 – A year of portraits – Tabatha

01.05.12 Tabatha

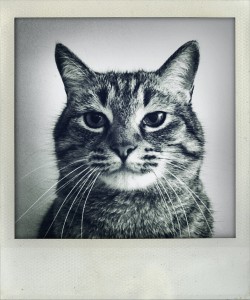
Well, after a hectic day of shooting and my primary 16gig Compact Flash Card dieing on me after my last photo shoot I kinda scrambled around for my portrait last night as the one I had planned on was of the boys basketball coach at Madisonville-North Hopkins. But alas, it was on the card, so that picture will come down the road.

I had another picture that I shot of Mike Stunson, one of our sports reporters, that I had planned to use since the other one wasn’t to be, and no this isn’t a picture of him… sorry Mike, but Tabatha won the contest last night. I figured I could easily get a good portrait of Mike, but as we all know cats aren’t always so cooperative.

I captured this with a new iPhone app that I’ve been playing around with and starting to love. It’s called NightCap and the nice thing about the camera is that it will take photos with shutter speeds down to 1sec on the iPhone (shoots in color). A really great feature for those of us that really don’t like the look that flash photography gives us, especially with a smart or dumb phone. It’s available in the iTunes store for 99cents if I remember correctly.

Post processing work was done with SnapSeed, where I converted it to black and white and did some sharping with the details filter before bringing the photo into ShakeitPhoto to apply the final Polaroid look.


January 4, 2012 – A year of portraits – Ricky Kirkwood

01.05.12 Ricky Kirkwood

01.04.12 Ricky Kirkwood

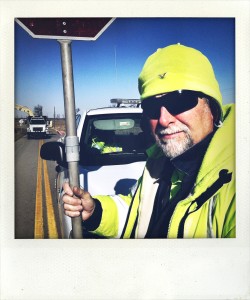
Today while out roaming the countryside on a beautiful winters day I came across Ricky Kirkwood on Kentucky 502 directing traffic for a DOT ditching crew outside of Nebo, Ky. I love the look of this picture starting from his direct look into the camera to the lines on the road leading back to the equipment working in the background.

I shot the picture with the Nikon D700, for page two of the paper, and then with my iPhone 4 with the native camera for this portrait of the day. As for the post processing on this picture: I opened up the portrait in SnapSeed and did some fine tuning in the contrast and sharpness areas, before applying the drama filter to it and de-saturating the colors slightly, due to the green hat and coat being so bright. Most of these type settings are purely subjective when working with a picture and I usually just play with the different effects till I get something I like. A lot of times though I have an idea in my mind of what I want the finished picture I’m shooting to look like, other times I don’t.

For the final Polaroid look for the picture I opened the corrected photo in another app called ShakeitPhoto which applied the frame to the photo along with the slight shadow along the inside edges of the photo. So, everything about today’s photo was done on the iPhone, except the posting of it to my blog here.


January 3, 2012 – A year of portraits – Marshae Hopson

01.03.12 Marshae Hopson

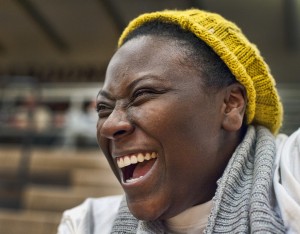
Today I met Marshae Hopson at the Madisonville-North Hopkins High School basketball game where she was waiting to watch a family member play. She called me over during halftime of the girls game to ask questions about the Nikon 5000 camera, which she’s considering buying. She loves taking pictures, but not necessarily having her’s taken, kinda like me. However she was gracious enough to allow me to shoot her portrait tonight for my project.

Camera of choice was my Nikon D700, which is my primary camera. Lens was a 50mm f/1.4 at 1/400th at f/2.8 with an ISO of 4, 000. I do love the D700 for shooting in low light, as I really don’t like using flash unless I absolutely have to. This image, as with everything I shoot with this camera, was shot on the RAW setting. I like using RAW as it gives me the most digital information that I can get from the camera, plus there’s a lot of processing I can do in the RAW file that gives me the best results in my opinion.

After bringing the photo into Photoshop CS5, I did some burning in around her to draw more attention to her great face and laugh. As a final step I used the Topaz Adjust filter “Photo Pop” to add a bit more sharpness to the photo.

This portrait just makes me smile!


January 2, 2012 – A year of portraits – Susan Cruzan

01.02.12 Susan Cruzan

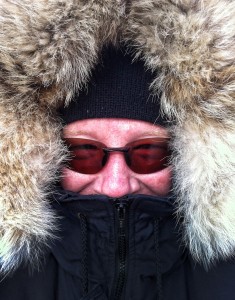
Susan is one of my morning walking partners and as you can tell she doesn’t like to be cold! This mornings walk at the Madisonville City Park was rather brutal for all of  use, what with the temperature being one of the colder days we’ve had and a pretty stiff wind didn’t help us to stay warm much, but seeing her bundled up like this was a portrait just waiting to happen.

I shot this with my iPhone 4 with the standard camera, but I couldn’t really get it to look the way I wanted it too using the photo processing app on the iPhone though, so I opened it up in Photoshop CS5 to do my editing.

Basically did some dodging, burning and sharpening to come up with the final portrait. I did use the Topaz Adjust Clarity filter to achieve the sharping I wanted. If you’ve not used this plug-in for Photoshop before you should check it out as it has a lot of nice presets that you can also fine tune to your own liking. Of course you can achieve the results yourself via the different controls in Photoshop via layer masking, sharping, levels and things like that, but for me, I don’t like reinventing the wheel so to speak.

Susan is an excellent teacher by trade, among many other talents, and having just finished her Masters and is looking for work. So, if you’re hiring… let me know!


January 1, 2012 – A year of portraits – Flint Bone

01.01.12 Flint Bone

Today begins a new challenge for me and my photography. I plan on doing a portrait day during 2012 and posting them here on my blog. My plans last year were to keep the blog more active, but things seem to always get in the way and so this year I’ve decided to make it a year long project to keep my blog more active and also get back into the writing end of things.

Not sure what the portraits will be each day, how they’ll be shot or processed or even if the subjects will be human, after all there’s many different types of portraits and I want to leave myself open to what ever comes along each day. My guess is that most of them will be of people, but the possibility exists that something else will slip into the mix.

As many of you know I like tinkering around with different and new things, hence my iPhone 4 and all the different applications that are available for it will be part of my camera bag during this year long endeavor along with my regular camera gear. Also, I may use different techniques in Photoshop and other similar programs to finalize the look I want for each portrait. I’ll try to convey to you the reader what I’ve done to achieve each final picture that I post here. Not only do I want this to be a learning process for myself, but also for you my readers.

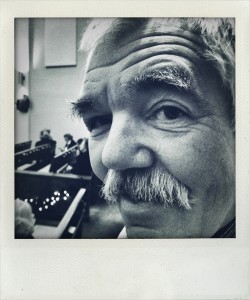
My first picture of the year is of good friend Flint Bone and being Sunday it was captured this morning at First Christian Church here in Madisonville, Ky. Flint and I have known each other I guess more years than either of us can recall. He’s the town locksmith and took over the Bone Lock and Safe Business from his dad, Jim Bone, a long time ago.

We’ve both been members of the church I guess since we were kids and the church was located at Main and Broadway here in Madisonville, Ky. Flint currently serves as an elder for our church and is into everything from photography to woodcarving. He’s one of those interesting characters that make my life much more enjoyable by just knowing him.

I used my iPhone 4 camera to make this photograph using the native camera that comes with the phone. I first tried post processing the photo with an application called ShakeitPhoto, which is available on iTunes, but just couldn’t get the look and sharpness that I wanted in the photo. As we all know digital photographs all seem to have a softness to them and for my tasted need a bit of tweaking. Of course the ShakeitPhoto app produces a color photo and what I wanted was a black and white version, but with the old Polaroid look to it.

So, since I couldn’t get quite what I wanted I went back to the original photograph, the program has a setting where the original photo is also saved to your camera roll before it’s processed in ShakeitPhoto, and brought it into another application on the iPhone called Snapseed (also in the iTunes store). Now, this application is similar to many other photo processing programs out there, but it’s probably my favorite one at the moment for the iPhone.

In Snapseed I then used the various presets to sharpen, convert to B&W and do a little dodging and burning in the photo. After I did all that I then opened the photo up in the Shakeitphoto app and processed it for this resulting image.

Work in progress

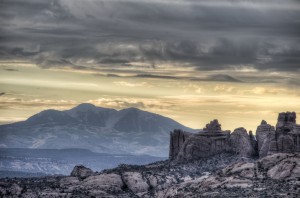
Arches National Park, Photo by Jim Pearson (c) 2011

Arches National Park, Photo by Jim Pearson (c) 2011

Well, it’s been a week since we got back off the road from our three week trip and I’m finally getting around to editing the pictures I shot with my D700. I hope to have some of them posted for your viewing pleasure in the near future as I didn’t take the time to edit and process them from the road. Most of all the photos that you’ve seen from me during out recent trip were shot and processed using my iPhone 4, which still continues to amaze me what you can do with such a small device now days. As I told my good friend Jose Lopez Jr. during our visit with him in Crestline, Ca, I really like my iPhone!

Most of the photos I shot using the D700 during our stay at Arches National Park were shot as HDRs and therefore will take a little longer to process, but I think the resulting images have a greater impact using the dynamic range you get with HDR. – Stay tuned and check back!

L.A. Photowalk

2011 Worldwide Photo Walk - Olvera Street, Los Angeles, California. - Photography by Jim Pearson, (c) 2011

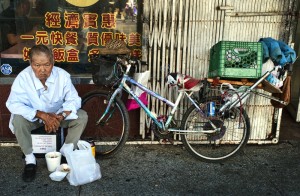
"Lunch Break" 2011 Worldwide Photo Walk - Olvera Street, Los Angeles, CA. - Photography by Jim Pearson, (c) 2011

Well, I finally edited down my favorite photos from my participation in the Scott Kelby Worldwide Photowalk. This is the fourth year the walks have been done globally and my third year of participating. If you’ve never taken part in one you really should look one up close to you next year and take part.

Usually I participate in the walk organized by the West Kentucky Photography Club and good friend Rennan Quijano at one of the community locations we do in our surrounding area, but this year I was on the road and as my sister has mentioned in an earlier post on this site, we were in Los Angeles when the walk was held this year.

This years walk was different as the only other person I really knew was my sister, so it gave me a chance to meet new photographers that share the same passion for capturing slices of history and moments in time with their cameras. We all had a great time. Continue reading L.A. Photowalk

Old Friends

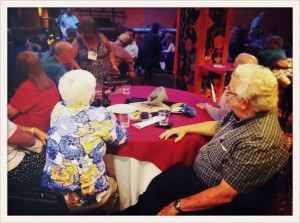
Ken and Manola Hackman listen as instructions are given for the next days events at the Combat Camera reunion.

Ken and Manola Hackman listen as instructions are given for the next days events at the Combat Camera reunion.

Well, today was the first day of my Combat Camera Reunion in Albuquerque, New Mexico and it amazes me that how easy it is to pickup with old friends that you haven’t seen for over 15 years. Don’t get me wrong because I do keep up with my fellow veterans, mostly though Facebook, but to actually see each other face to face it’s like it’s only been a few weeks and not many years.

Some of the names my many of military friends will recognize that are here are, Ken Hackman, Perry Heimer, Paul Harrington, Joe Coleman, Rob Marshall, Mike Creen and Bob Simons, among others.

We sat around and recalled old war stories from our days of capturing the history of the military with our cameras and when how things have changed in the world of photography from film to digital. It was great, but I finally gave out about 10 pm after a full day of driving and shooting pictures on the way here I was a tired puppy. Tomorrow morning we’re doing a group photo of those gathered here for the reunion before we all head off on a trip to Santa Fe for a day trip. Some are driving and others like sis and I are taking the train! When offered the option, what else was I supposed to do?

Still two more days of catching up, programs and war stories before we wrap things up. I’ll try to get some better images to show the group and what everyone looks like and has been up to over the next couple of days. – Stay Tuned!

First processing in a long time and camera samples

Here’s a couple samples from the first shots from my new “Analog Cameras” for our upcoming California and back roadtrip.

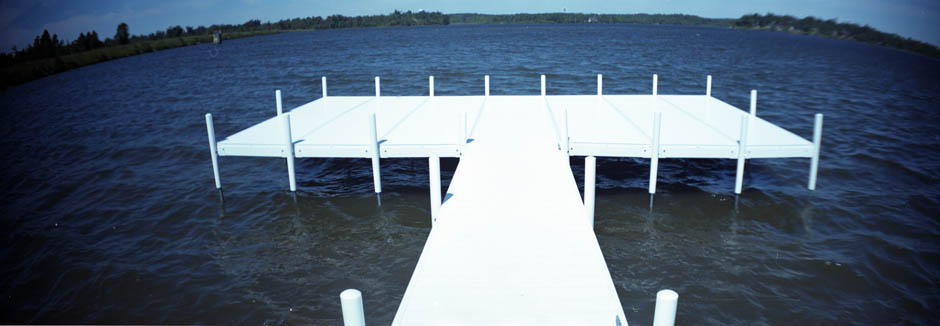
This is from the first roll on the Sprocket Rocket camera. Alas, the Epson V750 scanner I used to do this test wouldn't see the special holder that allows scanning of the sprocket holes so I had to use the one that came with the scanner which covered the sprockets. The image at the top of the site was also shot with the same camera. - Photos by Jim Pearson

This is from the first roll on the Sprocket Rocket camera. Alas, the Epson V750 scanner I used to do this test wouldn't see the special holder that allows scanning of the sprocket holes so I had to use the one that came with the scanner which covered the sprockets. - Photos by Jim Pearson


This is one of the images shot with the Holga 120 Superwide Pinhole camera. Pinhole photos have an inherent softness to them I had forgot about. Kinda nice, There's a ridge around the lens on the front of the camera and notice how the pinhole also caught the edges of it in the field of view. - Photo by Jim Pearson

This is one of the images shot with the Holga 120 Superwide Pinhole camera. Pinhole photos have an inherent softness to them I had forgot about. Kinda nice, There's a ridge around the lens on the front of the camera and notice how the pinhole also caught the edges of it in the field of view. - Photo by Jim Pearson


New Analog Cameras for upcoming trip

I just bought my first two “Film” cameras in probably over 10 years for my upcoming trip the middle of September. My sister and I will spend three weeks driving to California and back with the longest stops for my Combat Camera Reunion in Albuquerque, New Mexico, to visit friends in California and several days at Moab, Utah to do some shooting at Arches National Park. We will also stop overnight in many other place along the way of course… but I’m off the topic of my first post here, so let me get back to the cameras.

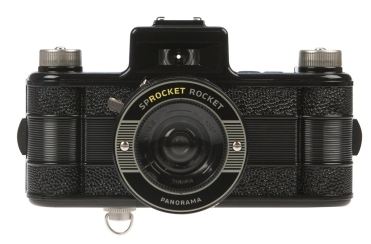
I wanted to do something different for this cross country trip, which I’ve done several times before over the years, mostly following the railroad to photograph trains. I saw a post on Facebook where a photographer had done a really nice series on events around the site of the twin towers in New York using a camera called a Sprocket Rocket. It’s a film camera that allows you to shoot panoramic photos on 35mm film and you can choose to use the sprocket area of the film to record your image on or not. I really liked the idea and purchased one from lomography.com for the upcoming trip. I’m currently working shooting some test shots for my first roll and will post a sample photo soon.

The camera has two settings for shutter speeds, 1/100 and Bulb, with two settings for f/stops which are 10.8 and 16… basically cloudy and sunny. So, it should be a fun camera to play with during my trip.

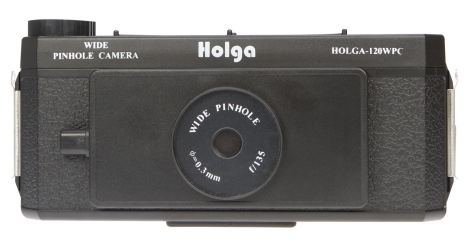
The other camera I bought from the same place is a Holga 120 Wide Pinhole Camera, It uses 120 film and since it’s a pinhole (f/stop around f/135) the only shutter speed is bulb! It’s also a superwide panoramic camera that shoots a negative/positive of 6x12cm, which is about two standard exposures on 120 film on one piece of film. Since I’ve got a bunch of refrigerated 120 film and still have my traditional darkroom, I’m in the process of shooting my first test roll of TMax 400.

I’m excited about the prospects of shooting with both these cameras for this upcoming and future trips over the years.

Of course I’m not going to be totally analog when it comes to the finished product with these cameras as I also bought film holders for both that will allow me to scan the film in to the computer and use my darkroom of choice these days, Photoshop.

Stay tuned… Jim