October 11, 2013 – Year long photo challenge
October 10, 2013 – Year long photo challenge
October 9, 2013 – Year long photo challenge
October 8, 2013 – Year long photo challenge
October 7, 2013 – Year long photo challenge
October 6, 2013 – Year long photo challenge
October 5, 2013 – Year long photo challenge
October 3, 2013 – Year long photo challenge
October 2, 2013 – Year long photo challenge
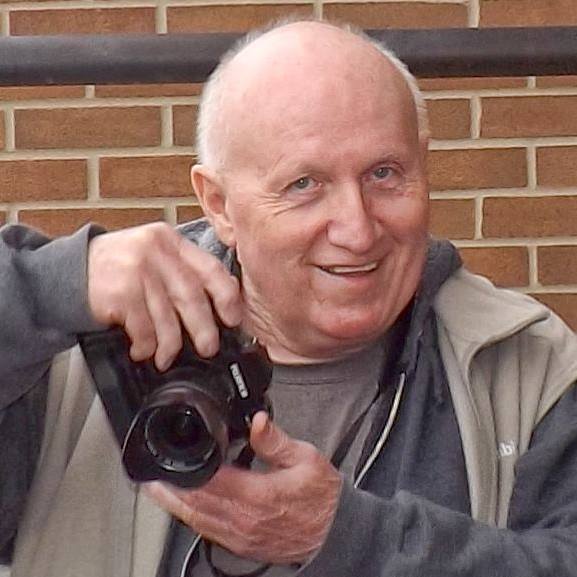
February 4, 2012 – A year of portraits – Dannye and David Pearson

02.04.12 Dannye and David Pearson
Processing was done with Photoshop CS5 by burning in the edges of the photo, adjusting levels, desaturated the image slightly and then applied a little sharpening in Topaz Adjust using the Simple Pop filter.
Camera: Nikon D700
Lens: Sigma 24-70mm f/2.8 @ 36mm
Exposure: Matrix Metering, 1/50, f/2.8 with an ISO of 4,000
File Type: Nikon RAW
A foggy morning swim

I love shooting in the fog and here’s on of my favorite images that I did earlier this week at of these early morning swimmers at Lake Peewee in Madisonville, Ky. This is one of my new images that is available for purchase as a signed/numbered limited edition 12×18 or 16×24 print in my sales store. Click on the photo to purchase a copy or visit my sales store using the link on the menu bar above for other prints and size options.
January 2, 2012 – A year of portraits – Susan Cruzan

01.02.12 Susan Cruzan
I shot this with my iPhone 4 with the standard camera, but I couldn’t really get it to look the way I wanted it too using the photo processing app on the iPhone though, so I opened it up in Photoshop CS5 to do my editing.
Basically did some dodging, burning and sharpening to come up with the final portrait. I did use the Topaz Adjust Clarity filter to achieve the sharping I wanted. If you’ve not used this plug-in for Photoshop before you should check it out as it has a lot of nice presets that you can also fine tune to your own liking. Of course you can achieve the results yourself via the different controls in Photoshop via layer masking, sharping, levels and things like that, but for me, I don’t like reinventing the wheel so to speak.
Susan is an excellent teacher by trade, among many other talents, and having just finished her Masters and is looking for work. So, if you’re hiring… let me know!
Work in progress

Arches National Park, Photo by Jim Pearson (c) 2011
Well, it’s been a week since we got back off the road from our three week trip and I’m finally getting around to editing the pictures I shot with my D700. I hope to have some of them posted for your viewing pleasure in the near future as I didn’t take the time to edit and process them from the road. Most of all the photos that you’ve seen from me during out recent trip were shot and processed using my iPhone 4, which still continues to amaze me what you can do with such a small device now days. As I told my good friend Jose Lopez Jr. during our visit with him in Crestline, Ca, I really like my iPhone!
Most of the photos I shot using the D700 during our stay at Arches National Park were shot as HDRs and therefore will take a little longer to process, but I think the resulting images have a greater impact using the dynamic range you get with HDR. – Stay tuned and check back!
L.A. Photowalk

"Lunch Break" 2011 Worldwide Photo Walk - Olvera Street, Los Angeles, CA. - Photography by Jim Pearson, (c) 2011
Well, I finally edited down my favorite photos from my participation in the Scott Kelby Worldwide Photowalk. This is the fourth year the walks have been done globally and my third year of participating. If you’ve never taken part in one you really should look one up close to you next year and take part.
Usually I participate in the walk organized by the West Kentucky Photography Club and good friend Rennan Quijano at one of the community locations we do in our surrounding area, but this year I was on the road and as my sister has mentioned in an earlier post on this site, we were in Los Angeles when the walk was held this year.
This years walk was different as the only other person I really knew was my sister, so it gave me a chance to meet new photographers that share the same passion for capturing slices of history and moments in time with their cameras. We all had a great time. Continue reading L.A. Photowalk
Old Friends

Ken and Manola Hackman listen as instructions are given for the next days events at the Combat Camera reunion.
Well, today was the first day of my Combat Camera Reunion in Albuquerque, New Mexico and it amazes me that how easy it is to pickup with old friends that you haven’t seen for over 15 years. Don’t get me wrong because I do keep up with my fellow veterans, mostly though Facebook, but to actually see each other face to face it’s like it’s only been a few weeks and not many years.
Some of the names my many of military friends will recognize that are here are, Ken Hackman, Perry Heimer, Paul Harrington, Joe Coleman, Rob Marshall, Mike Creen and Bob Simons, among others.
We sat around and recalled old war stories from our days of capturing the history of the military with our cameras and when how things have changed in the world of photography from film to digital. It was great, but I finally gave out about 10 pm after a full day of driving and shooting pictures on the way here I was a tired puppy. Tomorrow morning we’re doing a group photo of those gathered here for the reunion before we all head off on a trip to Santa Fe for a day trip. Some are driving and others like sis and I are taking the train! When offered the option, what else was I supposed to do?
Still two more days of catching up, programs and war stories before we wrap things up. I’ll try to get some better images to show the group and what everyone looks like and has been up to over the next couple of days. – Stay Tuned!
First processing in a long time and camera samples
Here’s a couple samples from the first shots from my new “Analog Cameras” for our upcoming California and back roadtrip.

This is from the first roll on the Sprocket Rocket camera. Alas, the Epson V750 scanner I used to do this test wouldn't see the special holder that allows scanning of the sprocket holes so I had to use the one that came with the scanner which covered the sprockets. - Photos by Jim Pearson

This is one of the images shot with the Holga 120 Superwide Pinhole camera. Pinhole photos have an inherent softness to them I had forgot about. Kinda nice, There's a ridge around the lens on the front of the camera and notice how the pinhole also caught the edges of it in the field of view. - Photo by Jim Pearson
New Analog Cameras for upcoming trip
I just bought my first two “Film” cameras in probably over 10 years for my upcoming trip the middle of September. My sister and I will spend three weeks driving to California and back with the longest stops for my Combat Camera Reunion in Albuquerque, New Mexico, to visit friends in California and several days at Moab, Utah to do some shooting at Arches National Park. We will also stop overnight in many other place along the way of course… but I’m off the topic of my first post here, so let me get back to the cameras.
 I wanted to do something different for this cross country trip, which I’ve done several times before over the years, mostly following the railroad to photograph trains. I saw a post on Facebook where a photographer had done a really nice series on events around the site of the twin towers in New York using a camera called a Sprocket Rocket. It’s a film camera that allows you to shoot panoramic photos on 35mm film and you can choose to use the sprocket area of the film to record your image on or not. I really liked the idea and purchased one from lomography.com for the upcoming trip. I’m currently working shooting some test shots for my first roll and will post a sample photo soon.
The camera has two settings for shutter speeds, 1/100 and Bulb, with two settings for f/stops which are 10.8 and 16… basically cloudy and sunny. So, it should be a fun camera to play with during my trip.
 The other camera I bought from the same place is a Holga 120 Wide Pinhole Camera, It uses 120 film and since it’s a pinhole (f/stop around f/135) the only shutter speed is bulb! It’s also a superwide panoramic camera that shoots a negative/positive of 6x12cm, which is about two standard exposures on 120 film on one piece of film. Since I’ve got a bunch of refrigerated 120 film and still have my traditional darkroom, I’m in the process of shooting my first test roll of TMax 400.
I’m excited about the prospects of shooting with both these cameras for this upcoming and future trips over the years.
Of course I’m not going to be totally analog when it comes to the finished product with these cameras as I also bought film holders for both that will allow me to scan the film in to the computer and use my darkroom of choice these days, Photoshop.
Stay tuned… Jim
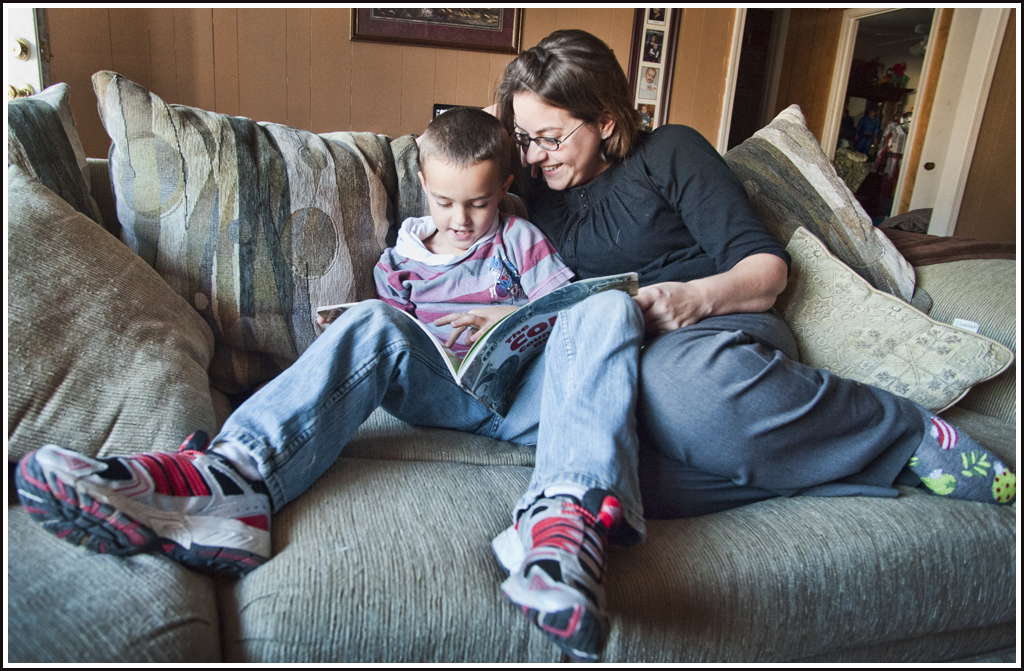
Photographing one person for a month
Since the beginning of December I’ve been working on a month long photography project of photographing the same person daily for a month and it’s been an interesting and challenging project. The whole event came about as the last month of a year long project I’ve been doing that involves taking a picture every day for a year. Along the way I’ve done several theme based months to help my project along and break up the routine.
My subject for the month is Gabe, a 7-year-old that is full of energy and imagination. My approach was to find out from his mom Tina just what all Gabe was into. We compiled a list of photo ideas that made up about 25 of the days in December and are filling in the remaining days with pictures that come up we didn’t think about in advance, and a couple have already done so. After compiling this list the shooting began.
We try to let Gabe decide what picture situation he’d like to do on a particular day since I wanted it to be a somewhat fun time for him as I thought that it would help capture a more natural look to the photographs that I shoot. Putting your subject at ease when shooting goes a long way at capturing images that show their true personality and I think that allowing him to pick the theme each day has done that for Gabe. Of course there’s some days I pick the subject as there’s some things I think are important to show what the life of a 7-year-old is like that perhaps he’d just as soon not show, such as doing his homework.
I try to keep the time spent each day on the photo shoot short as the attention span for a 7-year-old can start to dwindle as the minutes tick by and so I don’t want to drag the shooting out longer than necessary.
I plan on publishing my first photography book as a result of this project so stay tuned.


ClassicPAN… a great iPhone application
 I’ve always enjoyed shooting panorama pictures and for a long time I did so with a Fuji 8x17cm camera and currently have a 4×10 Patrick Alt view camera, but here lately I’ve been using a application for the iPhone called ClassicPAN which I’m really having fun with. The conventional iPhone camera stores picture files at a 4:3 aspect ratio, but ClassicPAN stores the same photos in a 9:4 panorama format cut at the top and bottom, resembling the output of a classic camera.
The app pretty much does what the Fuji and my 4×10 cameras do and that is take a picture where the film size actually crops a standard photo into a panorama. ClassicPAN takes the image (full frame) and basically crops it into a 12.96″ x 5.76″ image @200 ppi and shot with the iPhone 4’s 5.1mp camera you get pretty good quality for printing.
I have noticed that I’ve had to make shooting adjustments as the app does include more than you see in the application when you take the photo. I’ve gotten used to this and just preview the resulting image after shooting and if it’s not framed just like I want it then I just shoot another photo. I know I could just open the full frame photo and crop it in Photoshop or a similar program, but that wouldn’t be the same for me.
Other things about ClassicPAN is that it comes with is 13 film options ranging from Normal Negative to one called X-Proc Color and each of them have their own distinctive look. It also has an exposure compensation setting that ranges from + or – two full stops. It also has a set of five filters that you can put on the lens which are clear (skylight), red, yellow, green, and blue for another option for effects, plus the camera also uses the built in flash on the iPhone 4.

To enable the app to save your created pans in the highest quality make sure you go under your iPhone settings and select the ClassicPAN settings and turn on High Quality Prints and any other options that you find there.
For $1.99 I really don’t think you can go wrong in adding this app to your collection. Below are a few photos I’ve done with ClassicPAN. Click Graphic to visit App Website
Here’s what the app looks like:

Here’s some ohter Images I’ve done with the camera.


Sometimes color casts are good!

Photo by Jim Pearson
Most times I hate dealing with color shifts in my pictures and work hard to get rid of them, but today’s Santa Helper photo shot with my iPhone 4 actually helps add to the festive Christmas scene this morning at the Mall. Rain and cold weather drove me and my friends inside today and when I saw the Santa area setup for the Christmas Season I remarked that it’d be nice if I had someone sitting in the chair for my picture of the day and friend Megan Robertson jumped right into the chair for his amusing photo. I used the built in camera and did the processing of the photo using Photoshop CS5 and the Topaz Adjust “Clarity Filter” for the final photo. The border was applied using the stroke command in Photoshop.